THOUSANDS OF FREE BLOGGER TEMPLATES »
Showing posts with label camping. Show all posts

Wednesday, October 17, 2012

Our New to Us Camper

Summer 2011 we purchased a new to us tent trailer.  It is a Starcraft Centennial with some extra features that we love!  One being that it is high sided which means you do not have to flip over your sink to break down.  This saves time and allows for extra storage.  The second thing I love is the white cupboards and light  flooring!  I don't know why camper manufacturers still produce those awful brown cupboards.  If only the camper manufacturers would discover pintrest or blogs about people who mod their campers!  They might be inspired to try some colour inside!

The other great thing is air-conditioning.  I never thought it would be something I would want or need, but we travel to the states to camp and leave the fresh Bay of Fundy breezes behind us.  We have been so grateful to have this feature, especially this summer in New York when we camped less than hour outside of the city. Very hot!

Anyways, I thought I would post some photos because I know that other campers love to get ideas from one another!  I certainly have been inspired by other campers who show off their modifications, though with this camper I didn't have to work to hard like I did with my last one.  This was just needed lipstick!


I made new curtains and valance to replace the standard  tacky curtains that come with campers!  The little white and black dots on the wall are chalk & whiteboard dots that my daughter plays with!

The Clothes hanger on the ceiling is used to hang a shoe holder which is great for bread, chips, and other food items.  I use a plate shelf to elevate the toaster oven giving me storage underneath for plates, or whatever.  The shower caddy I cut to fit and use it to hold cups, dish soap, magnetic spice holders.

We have a tip out window and the kitchen slides out to give you  more room.  The tip out window was screaming for a modification.  We created this shelf from a closet system, wire and some s hooks.  We drilled two holes into the metal frame and voila, a sturdy shelf that I can't live without!

We added extra S hooks from Ikea to hang our Ikea mugs.

Using larger S Hooks, again from Ikea, I can hang my frying pan and my cute  little whisk from Anthropologie!


Opposite the door was a hanging closet.  I removed it as it was bulky and I would rather use the plastic drawers.  I also hang from the hooks in the ceiling from the closet, the 3 tier organizer.  Way more practical and keeps the camper feeling  roomy!

On this counter I used a shoe rack upside down and as you can see, I add my coffee maker, grinder, etc.. without losing counter space!  I hang my necklaces of the ends of the rack...very handy!  I also used more chalk board decals on the fridge...very handy!

Love all the cupboard space!

Double Sink, Hot & Cold Water and filtered water!
 
Love those 3M hangers.  No space is wasted.  I love my small Bodum kettle in Orange!  My toaster  oven is both a toaster in the traditional upright sense and a toaster oven!

There are drawers under the seats and plugs too!  You can't have enough plugs!


Very Roomy & Comfortable!

I always change the knobs in my campers.  So easy and fun!  Love the extra storage too!

Wednesday, June 06, 2012

Camper Remodel

New screens, canvas repaired, awning fixed.
 I'm finally posting photos of our old Bonair tent trailer that we sold last summer.  We bought this from one of my husband's co-workers in early May a few years ago.  Because the couple were sooo nice we didn't insist that they put up the trailer all the way.  They told us there were a few rips and some minor repairs needed.  So, we paid them and took our new trailer home so very excited!


Wow, I quickly became discouraged once the thing went up.  It needed so much work.  The canvas was in terrible shape with many rips and tears, the floor was soft in spots, the fabric on the beds, seat cushions and curtains was duck themed and I felt like crying!


But, my hubby reminded me that we got a great deal, the camper was made in Canada and was very sturdy over all and we both love fixer uppers and would have fun remodeling the tent trailer.  So, we went to work and worked hard under a tight deadline as our first camping trip was booked with my family!  


We removed all the canvas, I scrubbed all the mold off, then set about sewing patches into the canvas.  I used my trusty sewing machine, worked outside on the deck, found myself sewing with pounds of fabric draped over and around me.  My husband would have to hold the fabric to support the weight so that we wouldn't kill my sewing machine.


He replaced the floor underneath, painted any rusty items outside, we added new taps, plugs, shelving, I made new curtains and slip covers for the seats and added some fun items to organize and utilize space.  We laid new cushion floors, new door knobs, oh and new bug screens on every window...that alone saved us hundreds of dollars!  We finished it off by waterproofing the fabric.  Enjoy the before and after photos!

icky curtains

if only you could see the holes and tears in the bug screens...

ugly, dirty,  green slipcovers and gross curtains 
area where the floor was soft
New Curtains, New slipcovers, new cover on the mattress


This was a 12ft box and very spacious.  We added a shelf over the sink, new hardware on the cupboards, a new tap, spice rack, and many other extras.
The couch with a new slipcover and it folded out into a bed.  Very handy with four kids plus it had more storage underneath.
Loved these handles from Target

I used a shower organizer cut to fit to hold my retro melamine dishes and  other kitchen items.

perfect spot for drawers and our coffee maker
New Taps!

It really was spacious and airy!
Bed all made up for sleeping.  That is a locker organizer hanging of the rod and I used butterfly lights since our camper being older didn't have the connection in the ceiling.  It was perfect!

I still use this in my new camper.  At the top is where I put my paper towel  which is perfect!

Next time I will post before and afters of my new camper which I love!  It is one of those high sided tent trailers with all white cabinets!  Love it!


Friday, April 04, 2008

Dreaming of Camping...

Every year we take our kids camping...all six of us, two tents, sleeping bags, and a million other things you need to camp in comfort and style! It takes me a couple of weeks to prepare and pack, then another week to unpack and put away....so we limit our trips to 3-4 per summer season.

We always look forward to the meals and the fun times around the campfire. This year I definitely intend to try my hand at making bannock over the fire! Bannock is delicious made in the oven, and is one of those easy breads you can make in a pinch.

Irish Bannock

But, I do look forward to seeing the kids making bannock on a stick as a treat by the fire at night or in a fry pan or a dutch oven for breakfast with some bacon and eggs and fresh brewed coffee...yum!

Here are some interesting details and recipes for you to enjoy...I apologize, but I do not remember where I found these recipes or I would also include a link. I had it saved in my camping file.

What is Bannock?
Bannock is a bread that you can cook using little more than a fire
and a stick though it can also be baked or fried. Names for bannock
include bushbread, trail bread, grease bread and galette.
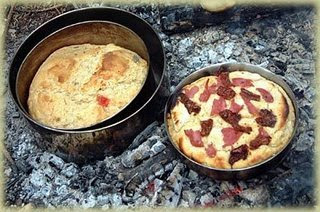

Bannocks origins are lost in the mists of time, but some believe
bannock was first made by the Scotts from the same oat flour that
gave their horses great strength and endurance. With stomachs fed
with hearty oat bannock those who became explorers and mountain men
in the new world introduced the bannock recipe to the Native
Americans and other outdoorsmen who lived in the wilderness.

The most simple bannock recipe consists of just flour of
nearly any kind and water. Kneaded into a dough and wrapped around a
green stick, this most basic bannock cooks into a fine tasting bread
that can be eaten alone or used as a basis for a full course meal.

Bannock on a Green Stick

The following recipe provides enough bannock for one day. Stored in a
waterproof bag, it is easy to carry a week or ten day supply.

1-cup whole wheat flour
1 teaspoon baking powder
¼ teaspoon salt
3 tablespoons butter
2 tablespoons milk powder

Mix all the ingredients well, making sure the butter is evenly
distributed throughout. Sometimes I will melt the butter before
adding it to the mixture. Then slowly add water while mixing until a
dough ball is formed.

Cooking Bannock...Make the bannock dough into a cigar shape and wrap it
around a green stick. Try to keep the thickness of the dough about ½
inch.

Slowly roast the bannock over a hot fire, rotating occasionally until
it turns a golden brown. You will hear the butter sizzling and your
stomach rumble as the bannock cooks.

Multi-flour Bannock Recipe
This combination of flours, spices, and dried fruit makes the bannock
a delicious meal of itself and makes me hungry just thinking about
it. It can be cooked over an open fire on a green stick or formed
into a loaf and baked and makes a 3-day supply:

1 Cup Barley flour
1 Cup Wheat flour
1/2 Cup Rolled Oats
1 Cup White Sugar
1/2 to 1 Cup Raisins or other dried fruit
1 1/2 Cup Buttermilk
1 teaspoon baking powder
1 tbsp. Coarse Ground Salt
1 tbsp. Cinnamon
1 tbsp. Cloves
1 tbsp. Nutmeg

Fried Bannock
If you like fried foods then you need to try fried Bannock.

4 cups flour
2 tbsp baking powder
2 tbsp sugar
1/2 can milk, mix with water
1/4 cup margarine/butter
2 eggs
1/4 tbsp salt

Mix all the ingredients so a dough ball is formed. Break off pieces
and flatten into rounds about ½ inch thick. Fry to a golden brown in
the oil of your choice.

Every camping enthusiast should know how to make bannock and
cook it over an open fire. The recipe your great grandfather used has
not changed and it remains an excellent food for the hungry survivor:

2.5 cups flour
2 teaspoons baking powder
½ teaspoon salt
One cup cold water
Mix and kneed the bannock ingredients. Then place in a greased pan
over a glowing bed of coals; or better yet cook it on a stick.